I have been playing Minecraft since it was in beta (before wolves, meatpops, sprinting...and when the game was on sale for $16 USD). So if I'm ever online in a public server and appear to be lost, it's probably because I've encountered (yet another!) new-to-me feature of the game and I can't figure it out.
I also enjoy reading web comics. Particularly Looking For Group (in it's earlier days), Darths & Droids (which I am now woefully behind on), and The Knit Princess (which my bestie April introduced me to).
The Knit Princess sadly went through one too many artist changes, and I've since stopped following it. But then either April showed me or I found something called Worsted for Wear. Other than being about knitting (whereas I am a crocheter), it had many true-to-life references for the yarn world in general.
One of these was for a website called Ravelry.com. I had never heard of it before, but I looked it up and was promptly floored.
It has to be the largest, most central place to find patterns for all types of crafts. Crafters can host their patterns (for sale or for free) in the database, and all you have to do is have a free login.

There are thousands of patterns in here!
Add to that the tools like Library (where you can store patterns you've bookmarked as cool), Queue (where you can set up a list of the projects you need to do and in what order you want to do them, and Projects (where all of your completed/ongoing/hibernating projects are stored with pictures and descriptions, should you choose to add them).
Here's what my current Project page looks like:

Newly-finished projects first; older projects toward the bottom.
For awhile, I was just collecting interesting-looking free patterns. Then I started out with hats (as evidenced by my previous two Avengers hats).
I quickly discovered a couple of other geeky patterns I wanted to try:
Minecraft Cake by Minke van der Zee

Minecraft Creeper (all sizes) by Minke van der Zee
But if there's one thing that I like to do to myself, it's to "improve" a pattern, even if it doesn't need it.
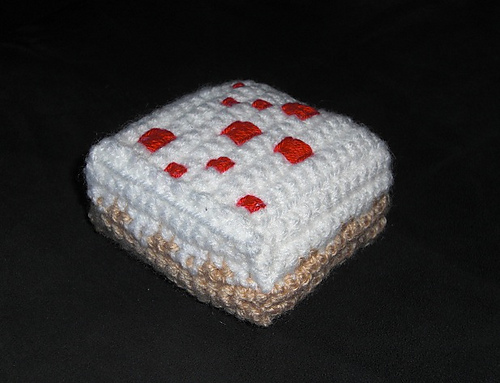
Let's start with the Minecraft cake. That's a tiny cake up there; a couple of inches square. In my mind, that was too small! Cakes are supposed to be half-slabs (that is, half the size of a normal Minecraft block).
I was going to make it bigger. (Like, three times bigger.) The project was worked in two large rectangles, and then sewn together into it's boxy shape.
This was before I had discovered/learned/figured out how to change colors seamlessly for a better, pixel-like appearance. Thus, my cake looked like:
If you'll look closely, you'll see how the icing edges are wavy.
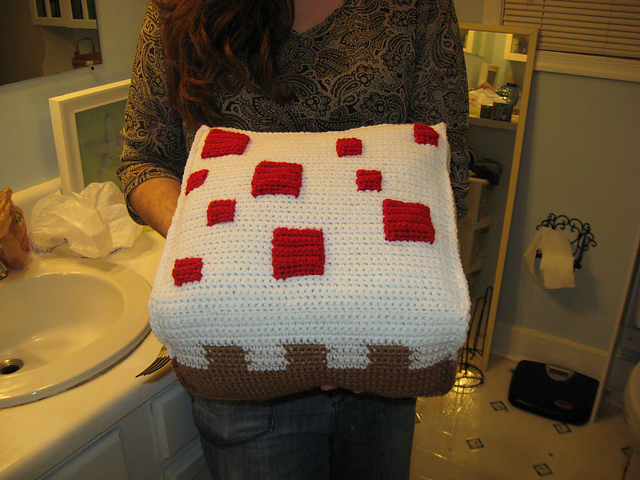
Yeah, that sucker was pretty large. I gave it as a gift to Midori for the first birthday of hers that I celebrated after becoming friends with her (we have only known each other a couple of years, and we're already thick as thieves), along with the code for her very own Minecraft account.
Would I make a cake like this again? No. I would make it using the new panel method I've invented for all of my current Minecraft projects, which would provide consistent seams on all six sides of the piece.
Plus, that method would allow me to incorporate the red 'sprinkles' as a part of the panel, instead of crocheting all these tiny squares separately and then hand-sewing them on to the top of the cake (which was a pain, because I am not the neatest sewer).
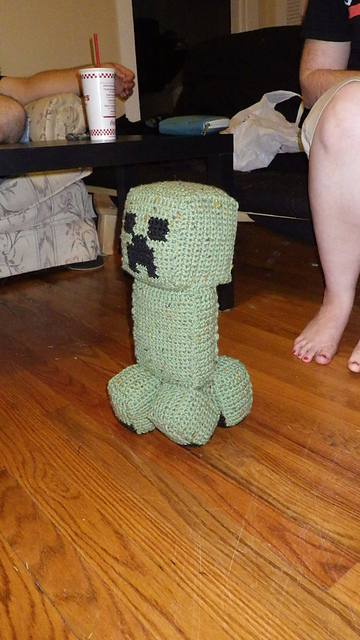
Then we come to my very first creeper:

This guy looks only slightly like the pattern picture (above).
In retrospect, it would have been better had I actually looked up the appearance of a real creeper before deciding I knew better than the pattern designer. >.>
For example, the body I made is actually square, whereas a proper creeper's body is rectangular, like in the original photo by Minke.
On the other hand, I was able to add a little more detail, like the line of black on the front of the creeper's feet (accurate according to Minecraft pictures).
I also modified the features of the creeper, which doesn't really do it justice. He just looks unhappy, as opposed to scarily, creepily, psychotically-stalkery unhappy.
The difference between the first creeper and a creeper done with my later method:
The primary differences being the body shape, and the facial features.
Needless to say, at this juncture I had a long way to go with understanding "improvements" to patterns.
So for awhile I worked on more amigurumi (crocheting in the round) projects, like the dragons in my 2013 posts. But then, I had this strange idea of trying to apply amigurumi to a full-blown Minecraft character.
Let me preface this by saying I don't recall exactly why I chose to do PauseUnpause. It may be because I was watching one or two of his vlogs/fanmail videos and he spoke about some of the things he'd overcome in his life; bullying, depression, etc.
Anyway, I felt for him. And he had an address to send fanmail to, should I decide to do that.
So I started with the chest piece, working it in flat panels and sewing them together. Yay! I went on to the arms and legs.
But then I made the mistake of assuming that I could transfer a square pattern to a round crochet style.
Here's a hint: it didn't work. Although, I still have the original set of limbs somewhere in my yarn stash. T_T
So I set Pause aside. Back to the drawing board. Maybe his skin was too complicated? How about somebody simpler?
Cue the VintageBeef plan.
(Dun dun dunnnnnn....)
Tomorrow. :D
No comments:
Post a Comment